Journal Entries
Week 1 (May 31)
I spent the first week learning the basics and getting situated in Pittsburgh. I have learned my way around campus and am slowly learning my way around the city. I received keys to the graphics lab and a CMU ID card so that I can get into Newell-Simon Hall after hours. I got to meet other grad students who are in my lab and hear about some of their research projects. Every Tuesday we have paper discussions over dinner. This week we read “Textureshop: Texture Syntheses as a Photograph Editing Tool” by Hui Fan and John C. Hart. I visited the motion capture lab which ran a subject and collected data for CMU’s database. I also started learning the basics of Maya from "Leaning Maya – Foundation." I completed the first 10 lessons which involved sending a ball through a flaming hoop and animating a jack in the box. Maya is an amazing tool and I still have so much to learn.
Jack-in-the-Box Maya Tutorial
Week 2 (June 7)

Since I learned the artistic side of Maya last week I began to learn the technical side this week. I started the week by learning how to use MEL (Maya Embedded Language) and how to write Maya plug-ins. Once I had a working Makefile and figured out the correct paths to get compiled code I created a simple plug-in with a moving pendulum and two joints. After I learned how to make working plug-ins I started to learn the program SD/FAST which is a program that “provides physically-based simulation of mechanical systems.” SD/FAST will provide me with code for the physics calculations that will be needed for the robot legs that I will be simulating. This week I was also given a few papers to read on how robots balance. Here I learned about control systems which will be very important later when I try to balance the robot legs.
Jumping Through Hoop Maya Tutorial
Week 3 (June 14)
I had more problems this week then I expected. I spent most of the week working with the code generated by SD/FAST. The tutorial that I had been working through was in FORTRAN 77 and I needed to convert the driver file to C. Since I don't know FORTRAN this became a surprisingly difficult task. Once I had compiling code(not working properly) I needed to find a way to link all the files into one compiling Maya plug-in. This involved spending a lot of time looking up Makefile information on the web until I finally had a working Makefile and a properly linked Maya plug-in. I have yet to get the SD/FAST driver file (in C) to produce the correct calculations. One of the most important things I learned this week was that grad students can sometimes be the most helpful resources out there. Without the help of the grad students in my lab I would still be staring at a Makefile.
Week 4 (June 21)
This week involved more debugging of code. I finally made progress with my SD/FAST code conversion from FORTRAN77 to C. The biggest problem with the conversion was realizing that the two sets of code that SD/FAST generated initialized the joints to different values. Once I found that integers being passed into FORTRAN functions needed to be different than integers passed into C functions all my calculation problems vanished. This was a very difficult error to find. Once I finally got code that was generating correct numbers I had to start incorporating it into a Maya plug-in. I had already started this process so I could at least get the code to run in Maya. I am still learning MEL script and that is slowing down my progress. I am working on making a user interface for the pendulum code that I generated in SD/FAST so that I can change the values of certain variables and have the code recalculate how the pendulum will respond. I have the MEL script set up to take an initial condition and animate a pendulum but I have yet to figure out how to change the values and recalculate/animate the pendulum again. Once I get this working I will repeat the process with a more complicated pendulum with two joints instead of one. I am certain that the second pendulum will be easier to work with because I have already dealt with the hardest part, learning the basics.
Week 5 (June 28)
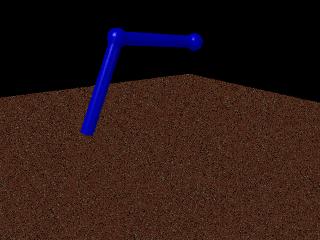
I finally made progress with my code this week!!! I got the simple pendulum incorporated into Maya as a plugin and created a very simple user interface with MEL script. After I had the simple pendulum working I began the process from scratch and attempted to make a pendulum with two controllable joints. I created the initial SD/FAST file which I did not have to do for the previous pendulum. I defined the physical laws acting on the pendulum and wrote a C driver so that I could change parameters. Once I had the driver file compiling I then created a Maya plugin with a slightly more complicated user interface. I now have a swinging two jointed pendulum where the user can control the angles at which each joint begins as well as the initial velocity of each joint and the weight of the two bars connected to the joints. Even though I worked on a more difficult problem and had to start everything from the beginning, the process moved at a much faster pace. Hopefully next week I will get the dimensions of the robot legs and begin working on the simulation.
Pendulum in motion
Week 6 (July 5)
I had hoped to start on the robot legs this week but instead I learned that I had a few more features to add to the swinging pendulum user interface. All the information that I read about in the second week concerning control systems finally came into play. I added a control system to my pendulum such that through the user interface a desired ending angle location can be chosen and the pendulum will be forced to that angle. I used a proportional-derivative servo which controlled the torque on the two joints and “pushed” the pendulum toward the desired position. To make sure that the constants I used where forcing the correct damping (not too much and not too little, but just right) of the joints I graphed different data sets and compared results. Other features I added provide the user with the option of using an input file to set all initial parameters for the pendulum (this feature will be more important when there are many initial parameters to specify), the ability to print all data to an output file for analyzing purposes and to displays the joint information for any specified time during the animation.
Week 7 (July 12)
I finally got to start working on a biped!!!!!! Jessica gave me an SD/FAST file for a
biped with a working example simulation. The beginning of the week involved being very
overwhelmed by an immense number of joints and degrees of freedom. I spent a lot of time
trying to read through the working example and figure out what exactly was going on in the
simulation. I then started incorporating the SD/FAST code into a new plugin that will
animate a biped. The first thing I did for the plugin was draw a biped with corresponding
joints to the SD/FAST input. I then started adding bits of code and attempted to make
sure everything was still compiling. I had many errors involving included files and
multiple declarations of variables. The code is now compiling and I can animate the biped
but I haven’t fully added a user interface. As of right now the animation can only be
hard coded. I found that the code method that I used for the pendulum was too slow for
the biped (because of extra calculations) so I am now looking for ways to speed
up my code and to finish the user interface.
This week I also set up an honors thesis to work on this year with James Kuffner, a
graphics professor at CMU.
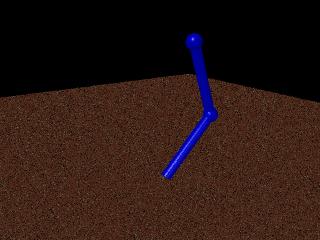
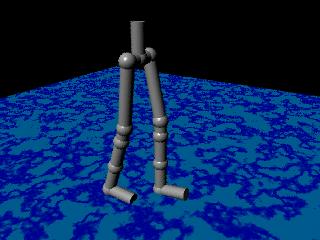
Biped in Maya
Week 8 (July 19)
I thought I was making substantial progress on my biped, however since this is research something has to go wrong before it goes right. I talked to Jessica about the project during our weekly meeting and we decided to change the implementation I was using for better error checking. I had originally set the location of the joints and the used the SD/FAST code to generate new angles at each iterative time step. I had the robot set as a hierarchy of joints therefore by changing one angle the rest of the joints followed. This method showed a robot that appeared to be working correctly. Jessica suggested that I change my method to set the location of each joint as well as the new angle of each joint. By looking at the orientation as well as the position it will be easier to see if the calculations are incorrect and if there is a problem with the code. There were errors! After searching through the code numerous times I found that the main error was not in the code but in the creation of the robot. I found that joints in Maya have hierarchies that are affected by individual joint position assignments. The position of a newly assigned joint would be in relation to the joint's parent instead of the ground which is what I had assumed. This produced some strange results. Hopefully, by eliminating the hierarchies the legs will behave correctly.
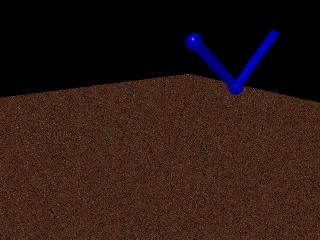
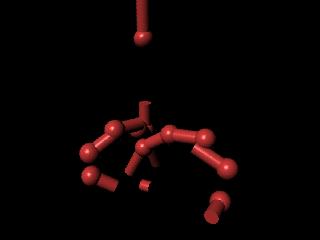
Biped with problems
Week 9 (July 26)
Eliminating the hierarchies helped with some of the problems but there will still obvious errors in the biped code. The joints were still not lining up properly and by setting initial angles the entire robot would fragment. So I was back to the code searching for more errors. I went back to the original SD/FAST file and after many more hours realized that the axis in the SD/FAST code not only required that I switch the y and z coordinates (this is a common transformation from how physics defines axes to how graphics defines axes). I knew the axes were wrong but it took Jessica to sit down and think through the proper transformation before the robot legs were finally facing down the positive X-axis and initial joint angles were not causing the legs to split into pieces. I finally had just about everything working. I spent the last couple of days cleaning up my code and adding additional comments. I then documented my work and explained how the files work, what files were needed to run the plugin, how to change the files to accommodate for a new SD/FAST implementation and so on. I will probably have a few more things to add or improve next week once Jessica looks at the final program but for now, I am done! Oh, but don't think I get next week off. I have that honors thesis I am working on with James Kuffner. So next week I will be starting a completely new project. Let the fun begin.
Week 10 (August 2)
This is my final week in Pittsburgh. I have been polishing up the code and making final touches on the biped project and found that there were still a few things that needed work. The error handling in the code was the biggest concern. The code generated by SD/FAST determines if there are errors in the calculations and if the initial input values cause errors. I changed my code to have better error checking using the code provided by SD/FAST. Now when errors occur a message will be printed for the user. I also started working on my honors thesis and spent a lot of time learning about particle systems. Since this is my last week, I packed up my room, said some goodbyes and headed back home. But it isn’t over yet. I am going to SIGGRAPH in LA next week so I get to see everybody from the lab again! I have had a wonderful summer, and I thank everybody who made it great.
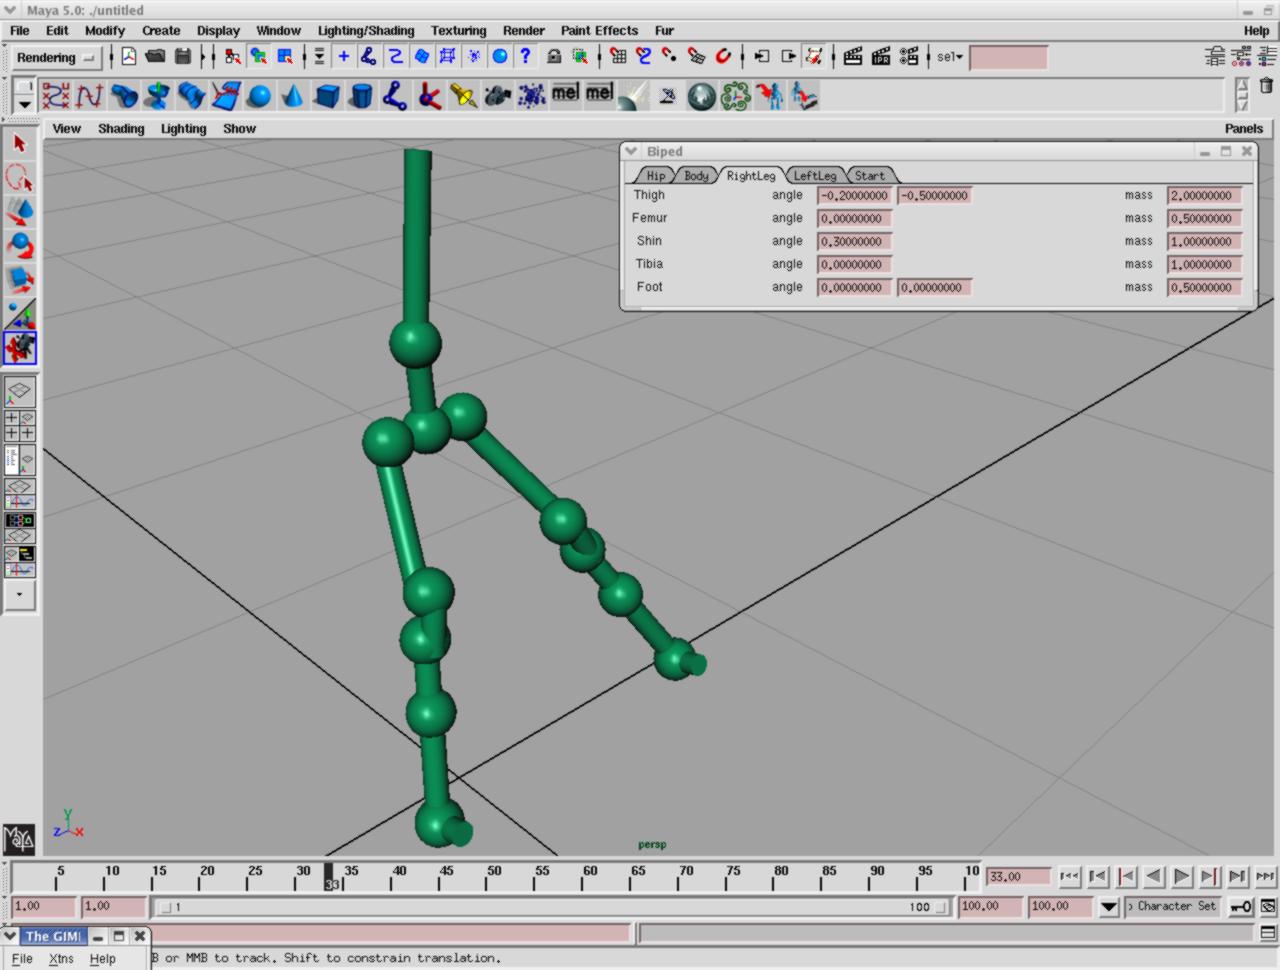
Biped working environment in Maya